
A Quick Guide to Cricut’s Mug Press: Everything you want to know
- Apr 26, 2021
- 5 min read
Updated: Feb 6, 2024
This Quick Guide to Cricut Mug Press will walk you through everything you need to know to make your first mug!
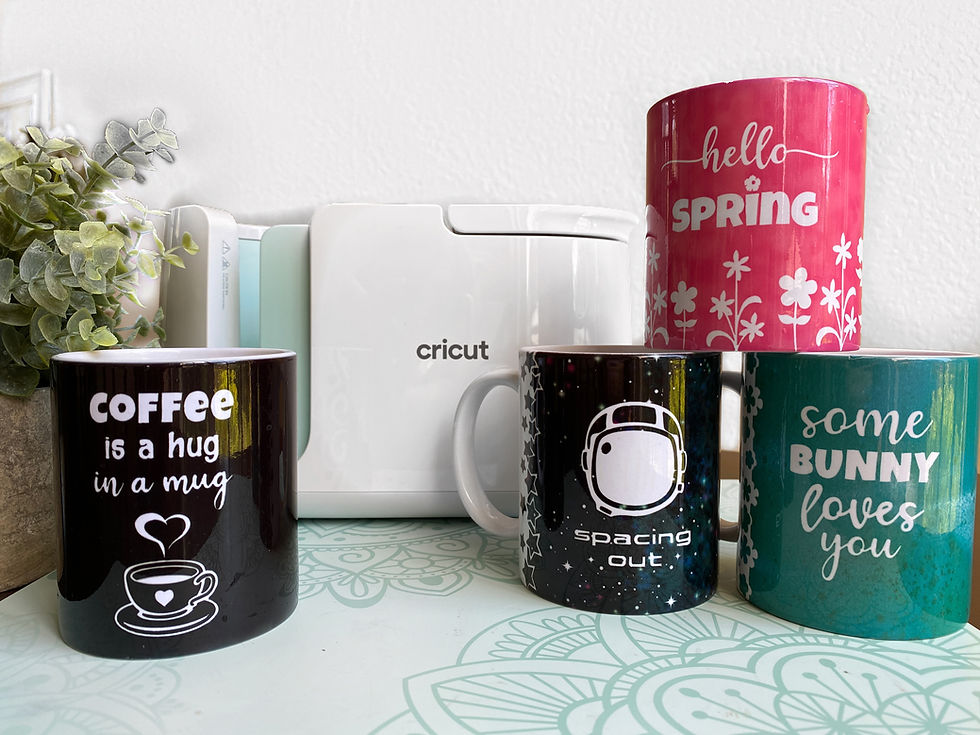
The Cricut Mug Press launched March 2021. The Mug Press makes it super easy to create custom permanent, dishwasher and microwave safe mugs at home! The long-lasting personalized mugs make perfect gifts for friends and family.

This post and the photos within it may contain Amazon or other affiliate links. If you purchase something through the link, I may receive a small commission at no extra charge to you.
My Amazon Shopping List for Mug Press Projects:
What you will need to create your first mug with the Cricut Mug Press:
1: A Cricut Explore Air 2, Cricut Maker 3 or Cricut Joy. You will need a Cricut machine to cut your mug’s design.
2: And, of course, a Cricut Mug Press.
3: Mug Blanks. Cricut Mug Blanks are designed specifically to fit in the Cricut Mug Press and are poly-coated to work with Cricut Infusible Ink transfer sheet. Cricut Mug Blanks come in two sizes; 12oz and 15oz. They have a smooth ceramic finish and straight walls.

4. Cricut Infusible Ink transfer sheet. The transfer sheets are made of a dry ink product, and when high heat is applied, the ink is actually transferred into (not onto) the base material. The ink transfer sheets look a bit like Cricut’s other sheets of vinyl, but they feel more like thick paper. Note that the transfer sheet colors looks less vibrant than your final project will turn out!
5. Your design. Catty Maker offers Cricut Mug Press wrapping templates with plenty of space to customize the design by adding your own text within Cricut Design Space.
The outer template of the design cuts completely out of your Infused Ink sheet making tabs that help with mug application before pressing (No need for transfer tape or to cut out the design with scissors.)

Optional items:
Gloves: If you have wet, clammy or oily hands you will leave fingerprints on your Infusible Ink transfer sheets. That is why I ALWAYS wear gloves when working with Infusible ink.
Heat resistant tape: You may need to tape smaller designs to your mug.
EasyPress Mat: You will need a heat resistant surface to place your mug on after you take it out of the Mug Press. A folded towel will also work well.
Lint-roller: Use a lint roller to prepare your mug before applying your Infusible Ink design by removing any debris from your mug.
Download FREE Paw Print SVG Design Now: Learn More
How to Use Cricut Mug Press
1. Select your design in Cricut Design Space (make sure you select the correct mug size file for the size mug you are making). Click “Customize It” to get started. Once your design is ready click “Make It.
Don’t forget to mirror!!! When working with Cricut Infusible Ink transfer sheets, you always need to mirror your design before cutting.
The material should always be inked-side up.
Helpful Tip: Set Pressure to "More" .... (I also changed my custom material setting for Infusible Ink to 268).

2. Turn on your Cricut Mug Press to heat up.
3. After cutting the design you will need to punch out the mug wrap template, which has been double cut by your Cricut and should just pop out. Then weed the design by gently curling the sheet and moving it around until the pieces pop out for you.

4. Use a lint roller to prepare your mug before applying your Infusible Ink Transfer Sheets design by removing any debris from your mug.
5. Set your mug on a flat surface and wrap the transfer sheet around the mug. Center your design, and stick one of the tabs down firmly behind the mug handle. Wrap the transfer sheet around the mug, smoothing as you go, and stick the other tab down under the handle. You want to get the wrap tight around the mug to prevent any air bubbles.

6. Now it’s time to press your mug. Lift the lever and place the mug in the Mug Press and press down on the lever. You may need to adjust the mug slightly as you press the lever to center the mug handle.

The 5 LED lights on the top of the Mug Press show the transfer progress. When all of the lights are lit up, the machine will beep to let you know it is done. Lift the lever and remove the mug by the handle. CAREFUL THE MUG IS HOT but the handle will be room temperature. Place the mug on an EasyPress Mat and allow it to cool for 15-30 minutes.

7. Once the mug is cool to touch, peel off the transfer sheet to reveal the design. The results are permanent, vibrant and seamlessly smooth!
Frequently Asked Questions:
How long does it take for the Cricut Mug Press to heat up?
It takes just under 4 minutes to warm up the Cricut Mug Press.
How long does it take to press a mug?
The average press time is 6 minutes. Time may vary depending on room and mug temperature.
Can you use a Cricut easy press on mugs?
The flexible heat plate in Cricut Mug Press is designed to transfer designs onto smooth, curved, ceramic Cricut Mug Blanks. Cricut EasyPress products have a flat heat plate which cannot safely secure a mug or apply even heat and pressure to a hard, curved surface.
Can you use other mugs with the Cricut Mug Press?
Yes! You can use non-Cricut mugs in the Cricut Mug Press, but they have to be specifically poly-coated for sublimation and fit in the Mug Press. You can't just pick up any old mug and expect it to work. When using non-Cricut blanks, look for poly-coated, sublimation-compatible products that meet the below specifications:
Capacity of 11 – 16 oz (350 – 450 ml)
Straight-walled drinkware only; avoid curves and textures
Diameter between 3.2" - 3.4" (82 – 86 mm)
Maximum height of 4.72" (120 mm)
How does the Cricut Mug Press Work?
The sleek, safety-conscious design features one-touch settings, temperature control, and an auto-off feature. No manual adjustments needed! The Mug Press takes the ambient temperature of your room and your mug to determine the perfect temperature to make the heat transfer. When heated up to the correct temperature the Infusible Ink becomes a gas and infuses into the surface of the Cricut Mug Blank.
Does my Cricut Mug Press always need to be connected to my computer when I'm using it?
No. Cricut Mug Press only needs to be connected to a computer for activation and firmware updates.
Do I have to use Infusible Ink?
No, Infusible Ink Transfer Sheets is the only option that Cricut offers for Cricut Mug Press. Infusible Ink sublimates into the mug blank to create vibrant, seamless designs that are dishwasher and microwave safe.
However, you can print your own sublimation designs using a Sublimation Printer, Sublimation Ink and Sublimation Paper.
Can I use Iron-On and/or Vinyl with my Mug Press?
No. HTV/iron-on and permanent vinyl results may peel, flake, and fade with washing over time. Do NOT put a mug with vinyl attached into your Mug Press. The vinyl will melt and potentially ruin your Mug Press.


Really enjoyed this guide! The step-by-step instructions make the Cricut Mug Press process easy to understand, especially for beginners. I also appreciate the practical tips for achieving a smooth, professional finish. Using Wrap Application Gloves during the wrapping process can improve grip and help keep the design neat. Great resource!